Today, we will create a simple Token for Kinda Lame on the Ethereum network. And, we will do it in under 10 minutes!
We will be creating a Token compliant to ERC-20 Token Standard. The ERC-20 (Ethereum Request for Comments 20) is a robust Token Standard that implements an API for tokens within Smart Contracts. ERC-20 Tokens are Fungible i.e. each Token is the same in type and value.
ERC-20 allows you to transfer tokens from one account to another, as well as get an account’s current token balance and the total supply of the token available on the network.
A Smart Contract implementing the following functions and events is called an ERC-20 Contract:
Functions
function name() public view returns (string)
function symbol() public view returns (string)
function decimals() public view returns (uint8)
function totalSupply() public view returns (uint256)
function balanceOf(address _owner) public view returns (uint256 balance)
function transfer(address _to, uint256 _value) public returns (bool success)
function transferFrom(address _from, address _to, uint256 _value) public returns (bool success)
function approve(address _spender, uint256 _value) public returns (bool success)
function allowance(address _owner, address _spender) public view returns (uint256 remaining)
Events
event Transfer(address indexed _from, address indexed _to, uint256 _value)
event Approval(address indexed _owner, address indexed _spender, uint256 _value)
Prerequisites
- MetaMask Chrome Extension (https://metamask.io/)
- Any ERC20 Implementation – We will be using a simple implementation by CodeWithJoe
- Remix IDE – Online (http://remix.ethereum.org/)
- Ropsten Ethereum Faucet (https://faucet.ropsten.be/)
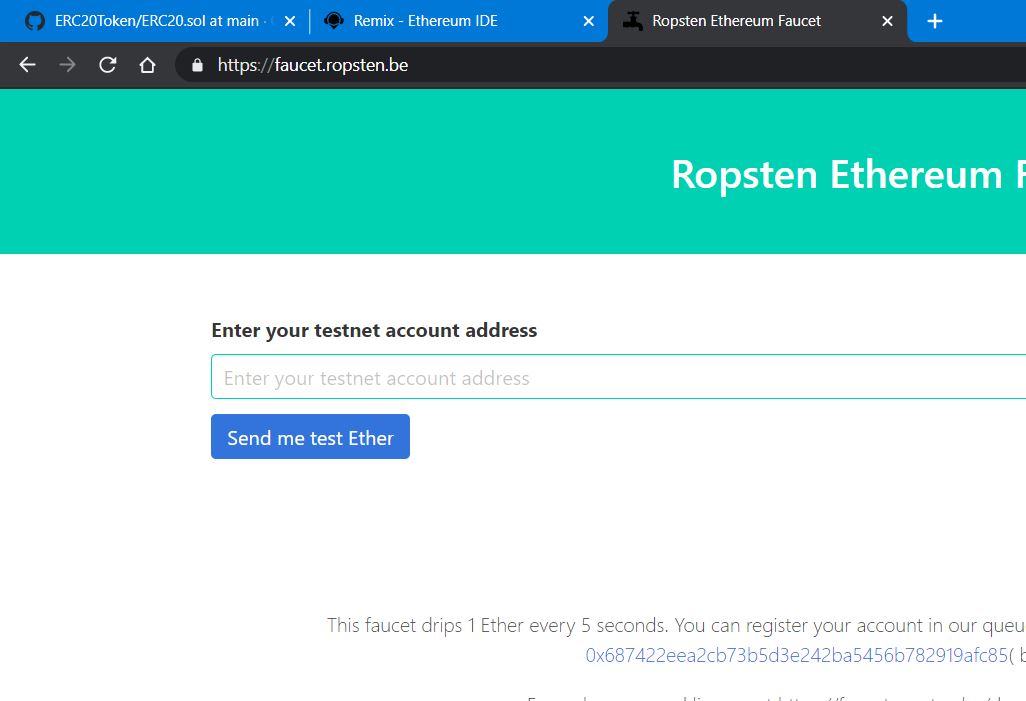
My environment looks like this:

You can then use a split window to read this tutorial on the side while you work with these 3 tabs.
Creating ERC20 Token
The ERC20 Token we will be creating is a basic one and the process won’t take very long. Just make sure you have the prerequisites set up.
Install MetaMask. Please refer to our blog about MetaMask and how to set it up, if you need help.
Open the MetaMask extension and switch to Ropsten Test Network.

Then we need some Ropsten test ether. First copy your MetaMask account number by clicking the area marked as blue below on your extension page. Clicking there automatically copies it to your clipboard.

Navigate to the Ropsten Faucet site and paste your account address. Click Send me test Ether.

Move back to your extension. Your account will now have been funded with 1 test Ether.

Programming With Solidity in Remix
Navigate to http://remix.ethereum.org/. Note that the URL is HTTP and not HTTPS. This is because with HTTPS remix sometimes does not work correctly.
Create a new file and end its name with .sol extension.

Copy and paste the code from https://github.com/CodeWithJoe2020/ERC20Token/blob/main/ERC20.sol
Considering starring it because the author has published this code for free.

Make some simple changes to the code like name, symbol and supply (highlighted in blue). Finally, switch to Compile tab by clicking second icon on the sidebar and click Compile.

Upon successful compilation, the sidebar should look like this.

Next switch to the deploy tab from the sidebar and make the changes marked in blue. MetaMask extension should open. Click Next. Then click Connect.

Changes shown zoomed in.

Finally, click Deploy. MetaMask extension will show up.

Click Confirm.
MetaMask transaction will complete and a notification indicating the same should appear.
Note the changes in debug console. Click the link which appears in your debug console.

Upon clicking the link a new tab like this should open.

Click the contract address. As you can see, the token has been created:

Now, let’s finish by verifying and publishing our contract on Ethereum blockchain. Click Contract tab on the Etherscan tab. Next click Verify and Publish.

Fill in the details including your source (solidity code). Click Continue.

Get compiler version from Remix:

On the next page, copy paste the code from Remix to the area provided:

Scroll to the bottom. Click Verify and Publish after completing the captcha.
It will take a few seconds and then the following screen will appear. Click the Contract address to return to contract page.

Our basic ERC-20 smart contract is now verified.

We will now add our token to MetaMask.
Adding your Token to MetaMask
Copy the contract address on top.


Click add custom token and paste the contract address.

Click Next. Finally, confirm by clicking Add Token. Your token will appear in your MetaMask account.

That’s all. We are done.
Final Words
We made a very basic ERC-20 token in just a few minutes. Isn’t that exciting?
We performed the whole process on Ropsten Test Network, so we did not have to spend any real gas. But, you can follow the same process to create your own token on the Ethereum Main Network. Just change it in MetaMask from the network list.
ERC-20 makes it very easy to make custom Tokens on Ethereum Network. However, it is still a new technology and sometimes bugs need to be ironed out. Fortunately, it has a large community supporting it and as of 2019, over 200,000 ERC-20 compliant Tokens exist on Ethereum Network signalling its bright future.
References
Ethereum Docs ERC-20: https://ethereum.org/en/developers/docs/standards/tokens/erc-20/
CodeWithJoe: https://www.youtube.com/watch?v=GDq7r1n9zIU (Check out his channel and show some love!)
Disclaimer
The information contained herein is for informational purposes only. Nothing herein shall be construed to be financial legal or tax advice. Trading cryptocurrencies poses considerable risk of loss.


Trackbacks/Pingbacks