
Last time we showed you how to hack the cheap little (and cute) Wyze Cam v2 with a Micro SD Card, some time and freely available software from GitHub. This time we hack the Yi Outdoor Security Camera with Yi Hack v4.
Now we are back again showing you how to hack the super cheap Yi Outdoor Security Camera. This device is under $50, has night vision, and when you pair it up with Yi-Hack v4 you can add SSH, FTP, MQTT and even RTSP support (RTSP for a small donation to the software project). Best of all, you can enable privacy mode and keep the camera from phoning home to the Yi servers in China.
Stop letting your devices talk to their servers!
You’re buying security cameras, stop sending the data back to their servers. Sure, they give you an app, they want to sell you video recording services, but would they back you up in court if you needed them to? And Why bother paying them when you can use software like MotionEye or Zoneminder to capture events and record yourself? Use the open source software people have put time into, take control of your destiny. To do so, you have to apply the hack to the Yi Outdoor security camera. Thankfully, it’s really easy to do.
Hacking the Yi Camera – What you’ll need
- YI Outdoor Security Camera, 1080P 2.4G Wireless IP Waterproof Night Vision
- Micro SD Card – 32 GB – While the documentation suggested a 16 GB or less card, I used this exact card with success. Plus I had a two-pack laying around (and honestly, when finding the link I grabbed another because the stock was running low).
- #1 Philips Screwdriver – The one you use to crack open your PC is too big, you need a smaller one!
Hacking the Yi Camera
How to hack the Yi Outdoor Security Camera
As in the last hack you’ll need to format the SD Card with a FAT32 partition. Again, I used my Linux desktop for this since I have a on-board SD Card reader that’s pretty fast. Since most cards come pre-formatted I just fired up GParted to double check the file system type.
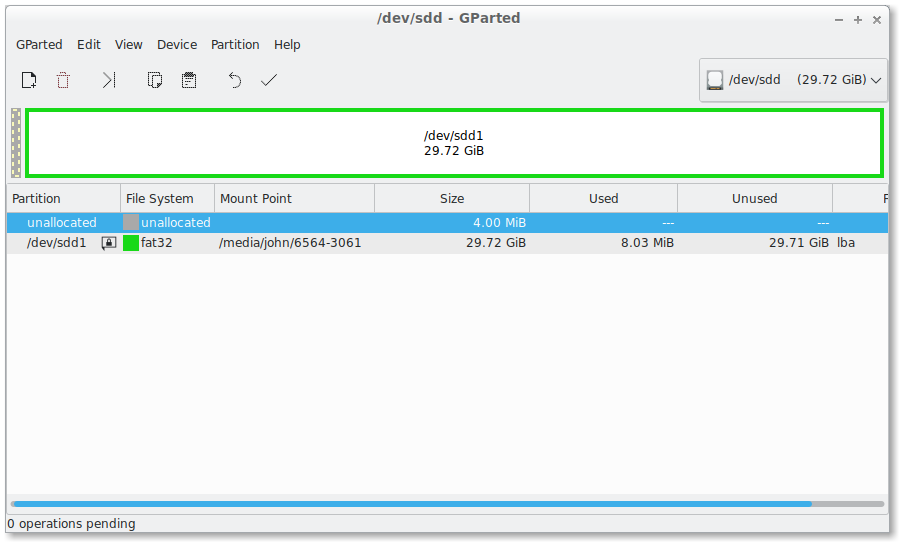
If you were using Windows 10, you’re in luck, Windows will either offer to format the card or you can right click on it in This PC and format it. Just be sure, of course, to select FAT32.
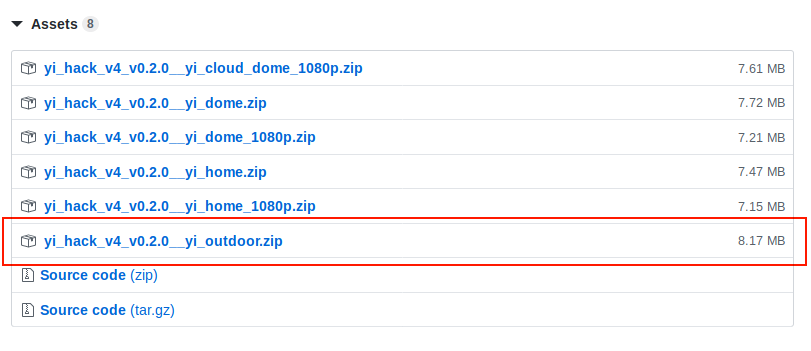
Obtain the hacked firmware files
Jump on over to the GitHub releases page for the Yi-Hack v4 site and grab the last release for the camera. There are others available, so be sure you’re grabbing the right one.
Once you have the zip file you simply need to extract the files to the root of your fresh and empty SD Card.

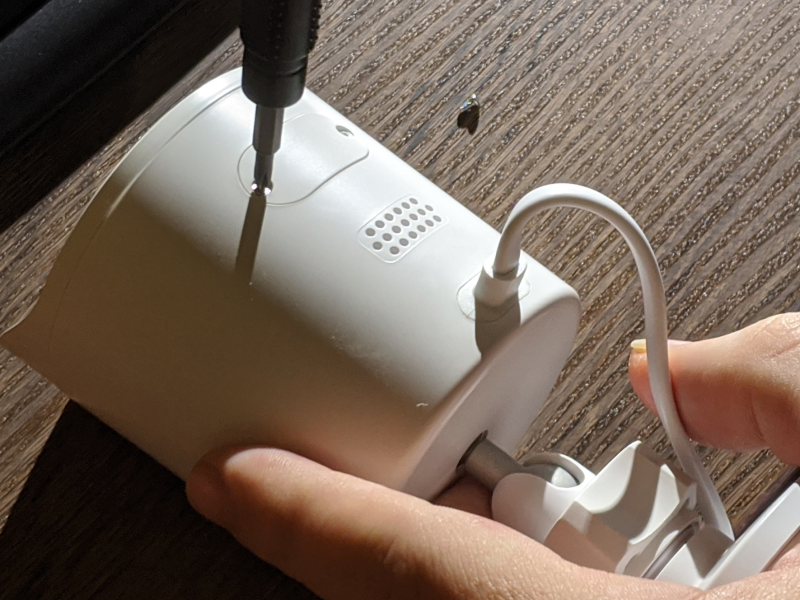
Once you have the files on the SD Card, you’ll need to open a tiny door on the bottom, with tiny screws, to access the SD Card slot on the camera. This is where our trusty #1 Philips screwdriver comes into play.
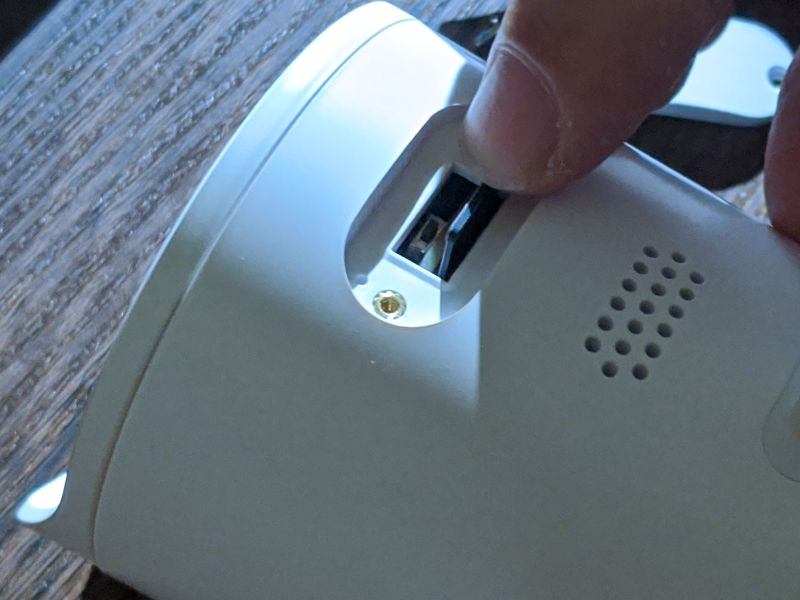
Inserting the SD Card into the Yi Camera Outdoor
Now, this is maybe the only hard part of the entire process. It took me about a minute of fiddling to ensure I had the SD Card in all the way. Rest assured, it’s not hard at all. I just didn’t want to have to make two attempts so I made sure to push the card in all the way. It does have a push-to-snap-back mechanism, and don’t worry, as long as you have it in the slot, you’re okay. The slot however is small and you’ll want to take a close look before inserting.
Finishing up the hack
You’re ready, power up the camera and go to the webpage for it. At this point you’ll be able to manage the settings and do what you need. Crypt0, the project lead, makes it really easy by setting the hostname for the camera to http://yi-hack-v4/. This works in most homes, but if you’re router won’t find the hostname, you’ll have to get on the router and find the IP address and manually connect.
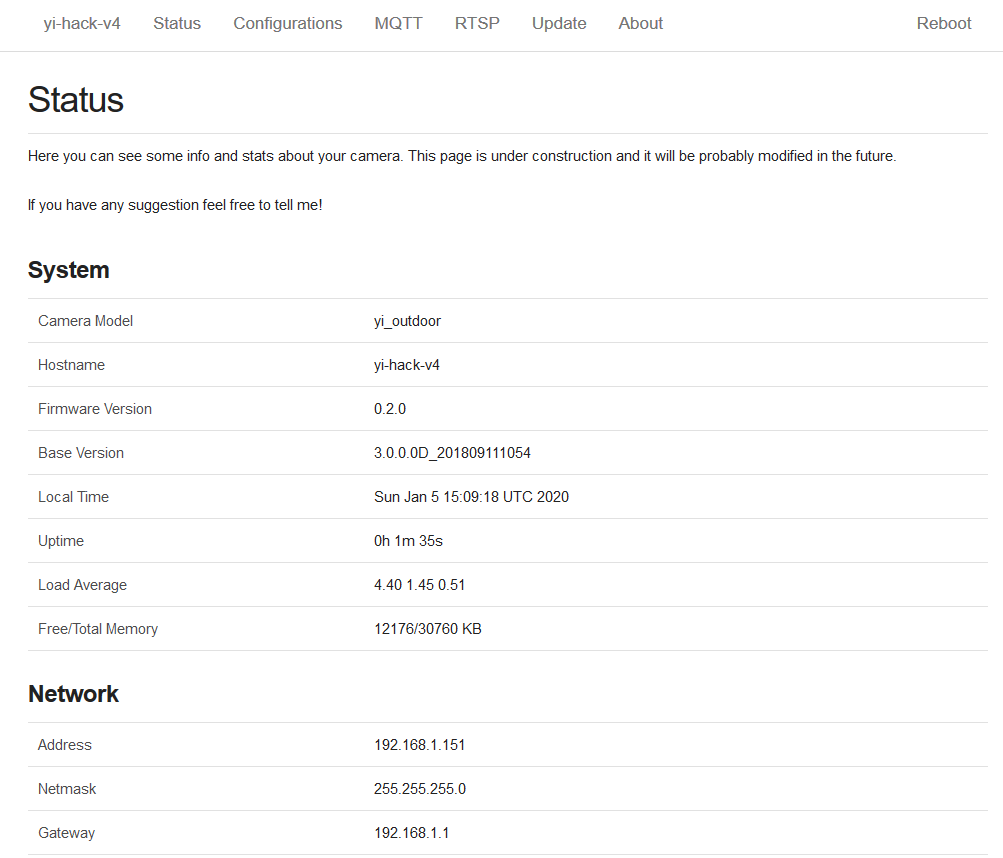
The first thing I did when I setup the camera is have it stop calling back to China. I’m going to make the donation for RTSP support so I don’t need the app and I never intended to use it when I bought the thing.
Setting the privacy restrictions for the Yi Cam

You’ll see above I am updating the hostname of the device, I’m going to install a second one after running through the hack again, on the back door. I want to be sure they have unique host names and I wanted to make them more familiar. Of course too, I’ve turned private mode on by disabling the cloud support and am going to test the “Recording without Cloud” function. Since I’m going to pipe it into MotionEye, it’s really just an experiment.
Of course, if I wanted to use the Yi App, change Wifi, etc, I can re-enable the feature.
Yi Camera Advanced Features

By default the FTP server isn’t enabled and neither is the NTPD server (to sync the time with the atomic clock servers worldwide, we’ll assume this thing doesn’t have a RTC chip). If you scroll down you can enable (or disable) these too.
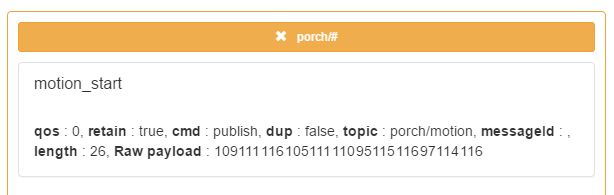
Enable MQTT
Since I’m running Home Assistant at home, Node Red and Mosquitto, I’m going to also turn on the MQTT support and feed motion events into those systems (Mosquitto -> Node Red -> Home Assistant most likely). Turning it on with Yi Hacks v4 is actually amazingly simple.
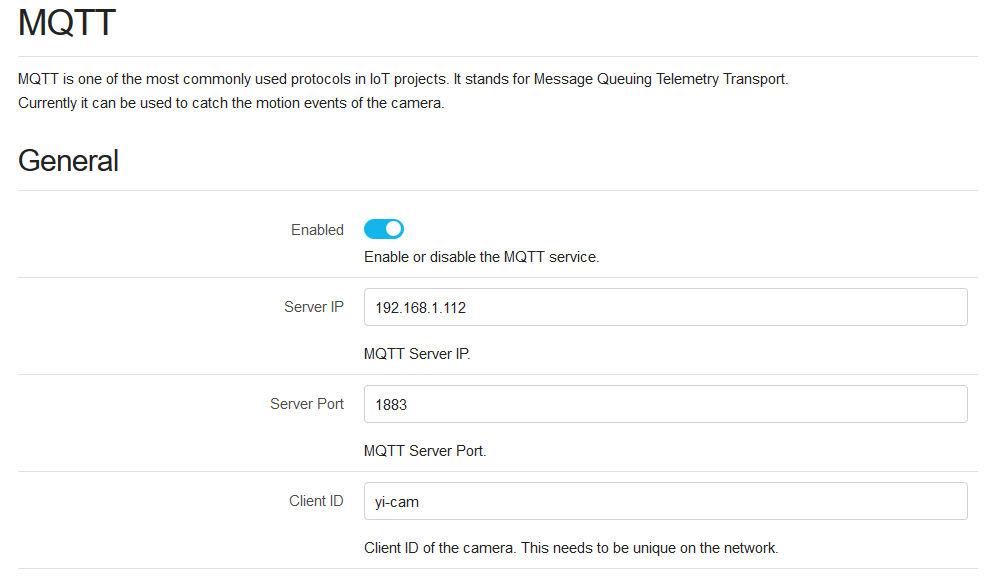
Omitted from the screenshot above is the section for security. You can easily set the username and password for your MQTT server in one fell swoop. Be sure if you’re running more than one camera to update the Client ID so they are unique to your MQTT server.
RTSP Support on Yi Hacks v4
The good and bad news
The good news is – Yi Hacks supports RTSP output. You can pick up the camera from apps like VLC, MotionEye, Zoneminder, Home Assistant, et. al. The bad news, you’ll have to donate a few British Pounds to do so. The good news, it’s going right to the GitHub project maintainer, so don’t feel too bad about being held ransom.
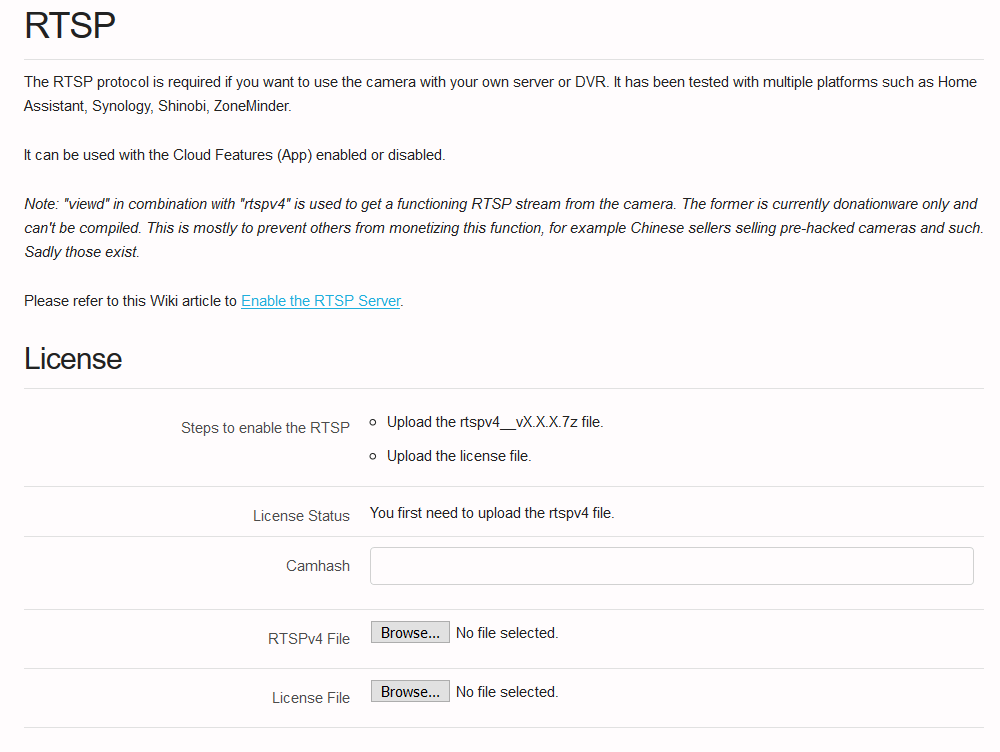
Obtaining the key just takes a few steps and some time for Crypt0 to email you a license key. You’ll have to hop into the Discord server for the hack (where you can also get some support) and request a donation. From there you’ll be sent to the site to tie your camera to the RTSP software and you’ll be good to go.
Final thoughts
Overall, the hack is easy, the camera is cheap – one of the easiest. At the same time, it wasn’t made abundantly clear upfront that I’d have to drop a few more bones to get the RTSP license key. But I feel good about supporting a project and hope that means some of the 101 open issues currently start getting closed.
Don’t wait, it’s a great camera, go grab one today. And check out our quick guide on proper camera placement for your smart home needs.


If you take a brand new Yi Outdoor camera and put the SD card in it at the outset, without first connecting the camera via the Yi app, it looks like you end up unable to connect to the camera. There is no opportunity to enter your password for your wireless network, and it sits there repeatedly saying, “waiting to connect …”. Perhaps it would be good to mention that you first connect the camera via their app before you hack the camera? Unfortunately, I was unfamiliar with the Yi products, and did not have any experience with how you connect to the camera.
I believe as well, though, you can hunt for and edit the wpa_supplicant file to enter the SSID & password.
Hi,
Thanks for the hack !
Can you tell if I can do it with a Mac ?
Thanks
Eric
You can but the steps for setting up the SD card might change. Let me know if you want me to update the article for Mac!
I just performed this hack on the second camera! It was a hassle to go through Discord to get the license key for RTSP but it worked and I did the hack in less than 10 minutes.
Little info : instead of using this hack, use https://github.com/alienatedsec/yi-hack-v5 !
Awesome, thanks!
I have a YI ? Maysly Smart ptz ip camera it is 1080 outdoor. TI have files on card buy they do not boot up on my camera
Is the RTSP license limited to one camera? or One license for any amount of cameras?
One license per camera, though Github has a new competing option that requires no licence.
Great guide thanks. Do have an issue with Motioneye though, can view the rtsp in vlc but when adding to motioneye i dont get the camera rtsp/udp. i just get “try again” , any ideas ?, many thanks
The problems I had with MotionEye were resolved by changing the output to be a bit lower quality/bitrate. I had to play with it to get it to connect well.