
Home Assistant + Node Red = Love
With the pandemic I wanted to actually start using the computers and gadgets I already had to their maximum potential. I had spare machines, smart devices, a little extra time, and just enough curiosity to get myself into trouble. Like a lot of people, I started by poking around Raspberry Pi projects and half-baked smart-home ideas that promised automation but mostly delivered fiddling.
What finally stuck for me was Home Assistant.
It was the first thing that felt like a real foundation instead of another toy project. It could discover devices, give me one place to manage them, and open the door to automations that actually made the house feel smarter. If you are just getting started, that is still the real appeal: one platform, on your own hardware, under your own control.
Start With the Right Kind of Setup
There are two sane ways to begin with Home Assistant today, and which one you choose depends on what kind of person you are and what kind of machine you want to run.
If you want the easiest dedicated-box experience, use Home Assistant OS. That is the appliance-style path. Put it on a machine, let that machine be your Home Assistant box, and keep your life simple.
If you want more control over the host system and are comfortable running Docker on Linux, use Home Assistant Container. That is the path I still like for people who already have a Linux machine they trust and who do not mind managing containers directly.
The Home Assistant team made this distinction clearer in 2025 when it formally deprecated the older Core and Supervised end-user installation methods. The supported long-term paths are now Home Assistant OS and Home Assistant Container, which honestly makes the beginner decision easier than it used to be.
Pick Hardware You Can Trust
Home Assistant does not need some absurd enterprise server. A recycled office machine, a mini PC, or another decent always-on box can do the job just fine.
What matters more than bragging rights is reliability.
I learned early that if you lean too hard on fragile storage, you will pay for it later. I ran Home Assistant on a Raspberry Pi 3b+ for a while, and it worked until the SD card eventually gave up and took my good mood with it. That does not mean Raspberry Pi is useless. It means your storage and backup habits matter more than whether the machine looks cute on a shelf.
If you already have a Linux host and want Home Assistant living alongside your other services, Container makes sense. If you want a dedicated smart-home box that just does the job, Home Assistant OS is probably the cleaner move.
Home Assistant Container on Linux
If you are going the Container route, the official Linux docs now assume you already have an operating system and container runtime ready to go. If you are using Docker, the docs say you need Docker Engine 23.0.0 or later.
This is the current shape of the command:
docker run -d
  --name homeassistant
  --privileged
  --restart=unless-stopped
  -e TZ=America/New_York
  -v /PATH_TO_YOUR_CONFIG:/config
  --network=host
  ghcr.io/home-assistant/home-assistant:stable
If you plan to use Bluetooth later, the docs also note that D-Bus is optional in general but required for Bluetooth integrations.
What the Important Parts Mean
One thing I still like doing is slowing the command down and looking at the pieces. A lot of this gets less intimidating once you stop treating the whole thing like wizard language.
--name homeassistant
This gives the container a predictable name so you can stop, restart, update, and inspect it without guessing what Docker decided to call it.
--restart=unless-stopped
This matters. A home automation server should come back after a reboot without you having to remember to babysit it.
-e TZ=America/New_York
Use your own time zone here. Schedules, automations, sunrise, sunset, and all the little time-based things depend on it.
-v /PATH_TO_YOUR_CONFIG:/config
This is the heart of the whole setup. Your Home Assistant configuration lives here, on the host machine, instead of disappearing inside the container. That makes it easier to inspect, move, and most importantly back up.
--network=host
The official Linux Container docs still use host networking, and for a beginner setup I think that is the right call. Device discovery on a home network is already enough of a moving target. There is no prize for making the network layer more confusing than it needs to be.
ghcr.io/home-assistant/home-assistant:stable
This is the stable image reference shown in the current docs. It is the one worth copying now.
First Boot
Once the container is up, head to:
http://homeassistant.local:8123/
If that does not resolve on your network, use the machine’s local IP address and port 8123.
From there, Home Assistant walks you through the first-run setup:
- Wait while it finishes preparing the system.
- Create the owner account.
- Set your home location.
- Choose your analytics and privacy settings.
- Finish into the default dashboard.
That first setup flow is much cleaner than it used to feel, and it does a good job of making Home Assistant feel approachable instead of arcane.
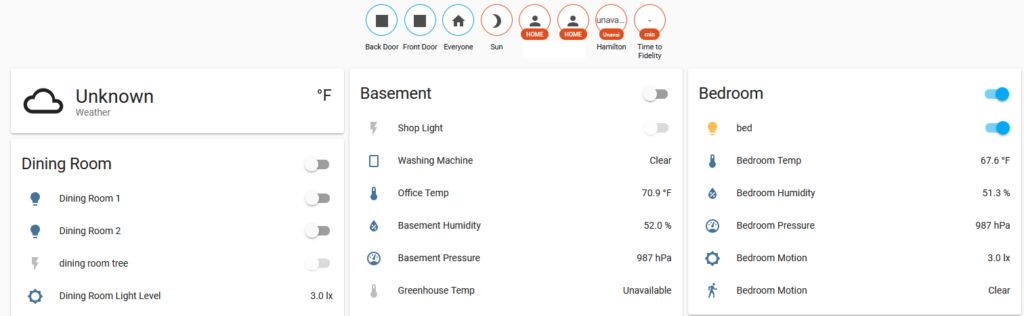
Our basic setup in a default Home Assistant server
Backups Need to Be Part of Day One
This is the part I would stress more heavily now than I would have when I first started.
Home Assistant now has backup support across installation types, and the Backup integration docs make it clear that backups can be created and restored broadly across the platform. Automatic backups can be set up from the UI, and container installs also have documented backup actions for local backup creation.
That means the right habit is not:
“I’ll back this up later once I really get into it.”
The right habit is:
- put your config in a location you control
- get the system working
- make a backup
- keep making backups before major changes
A smart home gets annoying fast when the smart part depends on memory and luck.
When Home Assistant OS Is the Better Move
Even though I still like the Container path, not everyone needs that much control.
If you are dedicating a box to Home Assistant and you do not care about also running a pile of other services on the host, Home Assistant OS is probably the easier recommendation. It is cleaner, more appliance-like, and better for people who want the system to behave like a product instead of a side project.
Container is still great if you want that host-level freedom and you already think in terms of Docker and Linux. Just do not choose it because you think the more complicated option is automatically the more serious one.
What To Do After You Get In
Once you can reach the dashboard, do not sprint straight into buying more hardware.
Do a few basic things first:
- make sure your location and time settings are correct
- confirm the server is reachable reliably on your network
- create a backup
- let Home Assistant detect what it can
- get comfortable with the interface before piling on automations
That is also the point where the rest of the series matters.
Part II is where configuration starts getting interesting. Part III is where sensors and actual automation logic begin to make the whole setup feel worthwhile.
If you want a newer adjacent angle after that, the Home Assistant voice article from 2026 is worth a read too. It is a good reminder that the ecosystem has gotten much broader than lights-on, lights-off automation.
Final Take
The easiest path to home automation is still not buying the most devices. It is choosing one solid platform, installing it in a supported way, and getting one reliable system online before you start trying to automate every corner of your life.
For me, that platform was Home Assistant.
If you want the simplest dedicated-box experience, start with Home Assistant OS.
If you want more control and already live comfortably in Docker and Linux, Home Assistant Container is still a very good way to begin. Just use the current docs, keep your config on the host, and treat backups like part of the install instead of a chore for some imaginary future version of yourself.


Trackbacks/Pingbacks