
I want to jump into a more advanced topic, but bypass some of the arguments that come with a lot of home automation setups. We’ll forgo the discussion of Zigbee vs. Z-Wave, and furthermore we’ll not even go down the path of discussing the best zigbee, z-wave or other home hub integration setup with Home Assistant.
Those discussions have been had on the Home Assistant forums. Instead I wanted to talk about what I know works, using the deCONZ integration with Home Assistant to pull information from a mesh of Zigbee devices. To do so you’ll need two basic things;
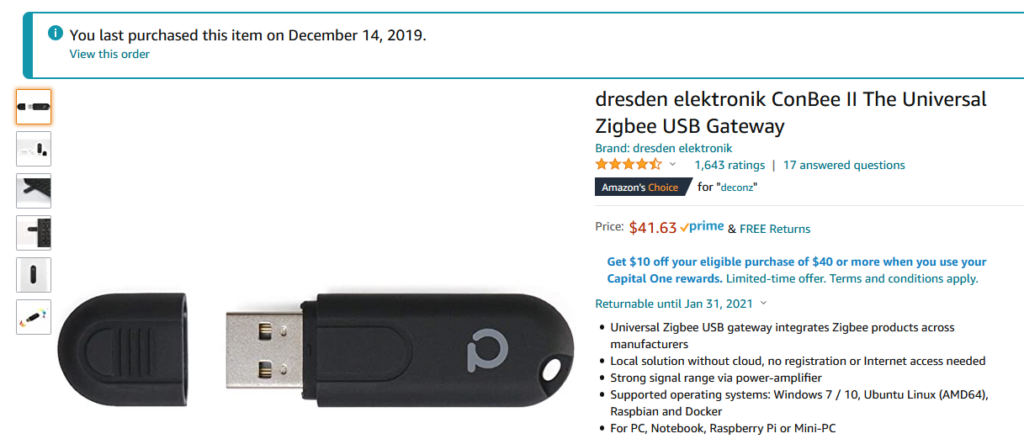
- A dresden elektronik ConBee II – the ‘hub’ of your new Zigbee setup. This handy USB device will talk to your other Zigbee devices and be plugged into your home automation server.
- Zigbee sensors – These will be motion sensors, temperature sensors, moisture sensors or whatever your home automation setup needs to drive intelligent automation decisions.
The Zigbee Hub on a USB Stick
The ConBee II, what drives the deCONZ integration with Home Assistant, is a tiny device which you’ll want to plug into your home automation server. Whichever machine is running Home Assistant will host the Zigbee hub from it’s USB port and the communications will happen between that PC and another Docker container we’ll start to talk to the the ConBee II.
After we get the ConBee II installed let’s just double check that Linux sees it, though we had no issues and it was basically plug and play. NOTE: (We recommend putting the ConBee II on a USB extension cable to lower the chances of interference with the PC itself).
In order to find the device mapping we’ll take a look at the Linux command line and run a command lsusb;
lsusbThis will give us a listing of the USB devices on the system with their bus ID and their device ID;
ima@debian:~$ lsusb
Bus 002 Device 003: ID 1058:25fb Western Digital Technologies, Inc.
Bus 002 Device 002: ID 1058:25fb Western Digital Technologies, Inc.
Bus 002 Device 001: ID 1d6b:0003 Linux Foundation 3.0 root hub
Bus 001 Device 007: ID 05e3:0761 Genesys Logic, Inc. Genesys Mass Storage Device
Bus 001 Device 008: ID 1a86:e050 QinHeng Electronics
Bus 001 Device 006: ID 1a40:0101 Terminus Technology Inc. Hub
Bus 001 Device 005: ID 0461:4e6f Primax Electronics, Ltd
Bus 001 Device 004: ID 04ca:008a Lite-On Technology Corp.
Bus 001 Device 003: ID 1058:25fb Western Digital Technologies, Inc.
Bus 001 Device 009: ID 8087:0aaa Intel Corp.
Bus 001 Device 002: ID 1cf1:0030 Dresden Elektronik
Bus 001 Device 001: ID 1d6b:0002 Linux Foundation 2.0 root hub
The device we’re looking for is made by Dresden Elektronik and is at 001:002 in the example we’re looking at above (and shown below):
Bus 001 Device 002: ID 1cf1:0030 Dresden ElektronikPerfect, Debian has detected the device and we’re ready to rock!
Installing The Zigbee Software
Like all things Docker installing the Zigbee software in itself is easy and you’re up and running with a single command line. Let’s take a look at the entire command before we break it down and look at our options.
sudo docker run -d \
     --name=deconz \
     --net=host \
     --restart=always \
     -v /etc/localtime:/etc/localtime:ro \
     -v /opt/deconz:/root/.local/share/dresden-elektronik/deCONZ \
     --device=/dev/ttyACM0 \
     marthoc/deconz
Yes, this is one line – you can actually copy and paste this into the terminal of your home automation server and it will pull the Docker image and start the container, likely possible without any changes needed.
Let’s take a quick look at the command to know what it’s doing and know what might need to be changed (if we’re not running Debian for example).
Breaking it Down
sudo docker run -dWe’re just starting out here telling Docker to run the image/container, and detatch from it so it can run in the background. We can later look at the logs, if we need to, by running a different Docker command.
--name=deconzHere we are naming the Docker container “deconz” (though the software is called Phoscon, oddly).
--net=hostLike we did with Home Assistant we’re telling Docker to ignore the stranger ways that Docker can setup networking and instead bind our software directly to the host’s network adapter. This means our software will be working on the IP address of the host machine and there won’t be any esoteric port mapping of any kind.
--restart=always This is a portion of a Docker run command which we should have not omitted from our Home Assistant container. The restart command line switch and option tells the system when it should restart a stopped container (such as after a reboot). In the example above we’re going to always restart the container, even if it fails.
A safer option might be to use the “unless-stopped” option of the Docker run command as opposed to “always”. This means upon reboot it would start up again, unless there was a catastrophe and you purposefully stopped the container.
-v /etc/localtime:/etc/localtime:roThis is a neat trick the developers of the container put in. Instead of passing the timezone, instead of telling the container the time zone through an environmental variable, we just map the local time zone file to the container. This works, out of the box, on Debian and most other Linux distributions. What you’ll want to do is be sure you have a file at /etc/localtime.
-v /opt/deconz:/root/.local/share/dresden-elektronik/deCONZ The above is what we’ve seen before with Docker, mapping a local folder to a container folder. What we’ve done in the above is tell Docker to look at /opt/deconz for the configuration files – this way they persist on our system and are saved if we should upgrade the container or even delete it later (which happens in container image upgrades).
--device=/dev/ttyACM0 \This is a crucial step and one we cannot bypass. Unless you have more than one deCONZ device or other strange hardware we likely won’t have to change anything here. What you can do, before running the Docker run command itself, is use ls to list the files matching ttyACM* in the dev folder. This will show you if you have a device such as ttyACM1, ttyACM2 – which is uncommon.
marthoc/deconzAnd in typical Docker fashion at the end of our run command we tell Docker which image to pull for our new container.
But Wait – One More Thing!
What we just did was create a container for deCONZ to run on ports 80, 443 and 5900 – which in most cases we might be okay. For a home automation server you can maybe get away with stealing ports 80 and 443 – you’re not going to host a webserver on the machine, right? But you might! There are cool tools such as Heimdall we recommend that are better at sitting on port 80 (or Next Cloud itself). We also want to be sure we can use VNC on the host machine and not block that – so we’ll move the container VNC port elsehwere.
Let’s move Phoscon (the software for deCONZ) off of port 80, the default port, and move all the defaults to a new set of ports. We can do this with environmental variables we’ll pass through to the container with Docker. In other instances you’ll instead bind a port to the host machine with Docker directly. Instead we’re going to talk to the setup inside the container before it starts to set the ports everything will listen on. While we’re at it we’ll set the password for the VNC server running in the container through the environmental variables as well.
Our modified command now looks like this;
sudo docker run -d \
     --name=deconz \
     --net=host \
     --restart=always \
     -e DECONZ_WEB_PORT=8742
     -e DECONZ_WS_PORT=8443
     -e DECONZ_VNC_PORT=5902
     -e DECONZ_VNC_PASSWORD=asdfase234r43q4gq34hj567i
     -v /etc/localtime:/etc/localtime:ro \
     -v /opt/deconz:/root/.local/share/dresden-elektronik/deCONZ \
     --device=/dev/ttyACM0 \
     marthoc/deconz
Let’s focus on the changes and show what we added;
     -e DECONZ_WEB_PORT=8742
     -e DECONZ_WS_PORT=8443
     -e DECONZ_VNC_PORT=5902
     -e DECONZ_VNC_PASSWORD=asdfase234r43q4gq34hj567i
The four lines above do the following;
- Set the webserver for the container, Phoscon, to port 8742
- Set the websocket port for the container to 8443
- Set the VNC port for the deCONZ software itself to 5902 (so our host can listen for VNC connections on port 5900).
- We set the password for the VNC server in the container to something lame and strong.
Setting it Up – Phoscon
Actually, you’re basically setup and have a running set of software for Zigbee. You are now ready to pair with a Zigbee device and could start integrating them with Home Assistant. Let’s see what we need to do to finish up.
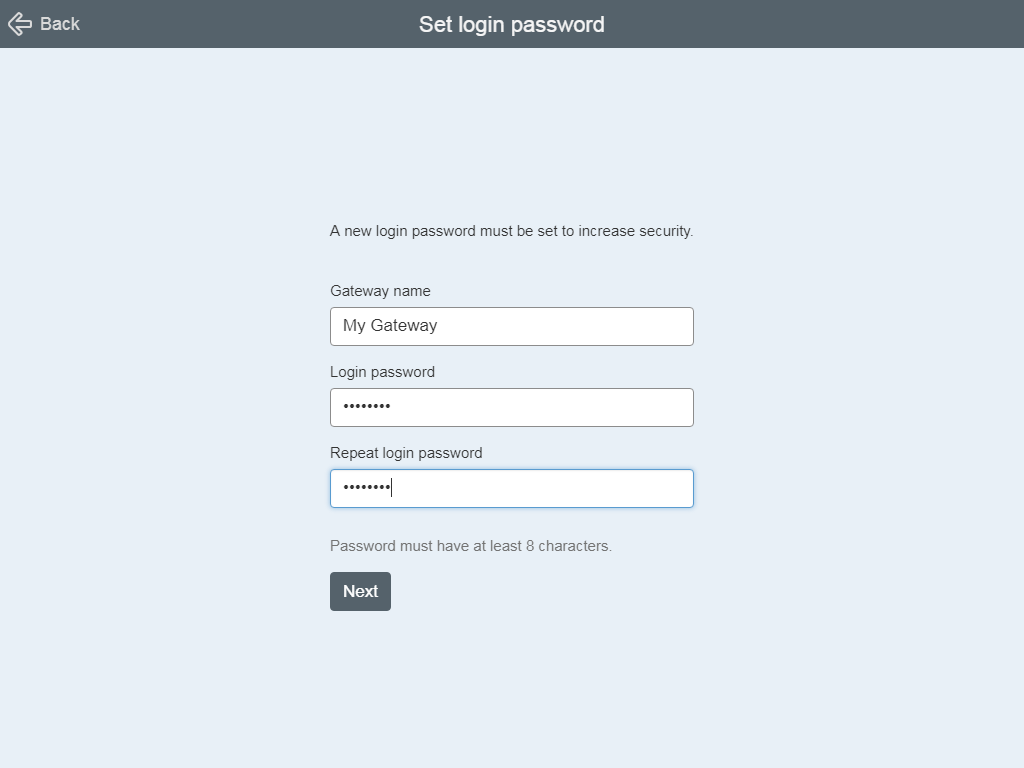
First visit your home automation server in the browser and set it to point to the port we opened earlier in the deCONZ container – we’ll assume you’re at the machine now so you can use the below;
http://localhost:8742When you arrive, you’ll be able to set the name of your new Zigbee gateway and the password to access the webui (there is no username);
Now you can start adding sensors as you’ve setup the Zigbee hub hooked up to your home automation server.
Pairing Your First Sensor
Now that Phoscon is running, it’s time to add a “thing.” For this guide, I recommend starting with something cheap and reliable, like an Aqara Door/Window sensor or a Sonoff Motion Sensor.
- In the Phoscon UI (at
http://[YOUR-IP]:8742), go to Sensors and click Add New Sensor. - The system will start searching. Now, grab your sensor and hold the reset/pairing button for about 5 seconds until the LED flashes.
- Once detected, give it a clear name (e.g., “Front Door Sensor”).
- Protip: If it doesn’t pair immediately, move it closer to the ConBee II for the initial setup. Once paired, the Zigbee mesh will help it stay connected from further away.
Bringing Sensors into Home Assistant
The magic happens when Home Assistant sees what Phoscon sees. Because you are likely using the deCONZ integration:
- Navigate to your Home Assistant instance.
- Go to Configuration > Integrations.
- You should see a “Discovered” integration for deCONZ. Click Configure.
- It will ask you to “Unlock your gateway.” Go back to the Phoscon UI, go to Settings > Gateway > Advanced, and click Authenticate App.
- Within seconds, your Zigbee sensors will appear in Home Assistant as entities (e.g.,
binary_sensor.front_door_sensor).
Practical Automation: From “Smart” to “Helpful”
Having data is fine, but having a home that reacts is better. Here are three “starter” automations to try:
- The Energy Saver: If the “Balcony Door” is open for more than 2 minutes, turn off the AC or Heater.
- The Midnight Path: If the “Hallway Motion Sensor” detects movement between 11 PM and 6 AM, turn on the bathroom lights at 10% brightness.
- The Flood Alert: If a “Water Leak Sensor” under the kitchen sink detects moisture, send a notification to your phone immediately.
Home Assistant: Now a “Native” Matter Powerhouse
In 2026, Home Assistant (HA) is no longer just “compatible” with Matter; it treats it as a first-class citizen. Gone are the days of manual YAML configurations or beta-testing specific bridges.
- Native Settings Panel: As of the 2026.2 update, Home Assistant moved Matter and Thread settings to the top level of the configuration menu. You can explore the official Home Assistant Matter documentation to see the new dedicated “Matter Dashboard” which monitors the health of your “fabrics” (the virtual networks your devices live on).
- Built-in Commissioning: You no longer need a third-party app to get devices onto your network. If your hardware includes a radio, such as the Home Assistant SkyConnect or the Yellow, you can commission Matter-over-Thread devices directly from the HA mobile app.
- Advanced Device Support: HA now supports the newest Matter 1.4 clusters. This includes robust Energy Management (tracking EV chargers and solar inverters) and expanded controls for Robot Vacuums, allowing for native start/stop/dock commands without custom integrations.
Apple Home: The “New Architecture” Era
Apple made a major move on February 10, 2026, by officially ending support for the “Original HomeKit Architecture.” This shift streamlines how devices talk to each other but raises the hardware requirements for your hub.
- Mandatory Upgrade: To use Matter devices in Apple Home now, you must upgrade to the new Home Architecture. According to Apple’s official support guide for Matter accessories, this requires a HomePod (2nd Gen/Mini) or Apple TV 4K to act as a permanent Home Hub and Thread Border Router.
- Seamless Multi-Admin: Apple’s “MatterSupport” framework now allows you to “Share to Home Assistant” with a single tap. This generates the pairing code internally, so you no longer have to go hunting for the physical QR sticker on the back of a mounted light switch.
Google & Amazon: Deepening the Mesh
- Google Home: Google has updated almost all Nest Hubs and Nest Wifi units to act as Matter Controllers. You can follow the Google Nest Matter setup guide to enable “Familiar Face” triggers for Matter-compatible cameras, bringing advanced AI detection to the local mesh.
- Amazon Alexa: Amazon has surpassed 100 million Matter-enabled Echo devices. Their 2026 focus is on “Ambient Home,” which uses Matter sensors to trigger Alexa Routines locally. Check the Amazon Developer Matter portal for a list of newly supported device categories, including smoke detectors and air quality monitors.
Key 2026 Tech Specs to Look For:
Energy Management: 2026 is the year of the “Matter Thermostat” update. This allows for “Occupied Setback” logic—meaning your heater knows exactly how much to “drift” when you’re gone to save money without the risk of freezing your pipes.
Matter 1.4 Features: Look for “HRAP” (Home Router as Access Point) support. This allows your Wi-Fi router to automatically act as a Thread Border Router, finally eliminating the need for extra USB dongles.


Trackbacks/Pingbacks